


Upgrading your home's hardware is a simple yet effective way to enhance both functionality and aesthetic appeal. A crucial component of any door is its hinge, and choosing the right one can make a world of difference in durability and performance. This comprehensive Stainless Steel Hinge Installation Tutorial will guide you through every step of the process, ensuring you can achieve a professional, long-lasting result. Whether you are replacing old, worn-out hinges or installing a brand-new door, a proper installation is key to a smooth, quiet, and secure operation for years to come.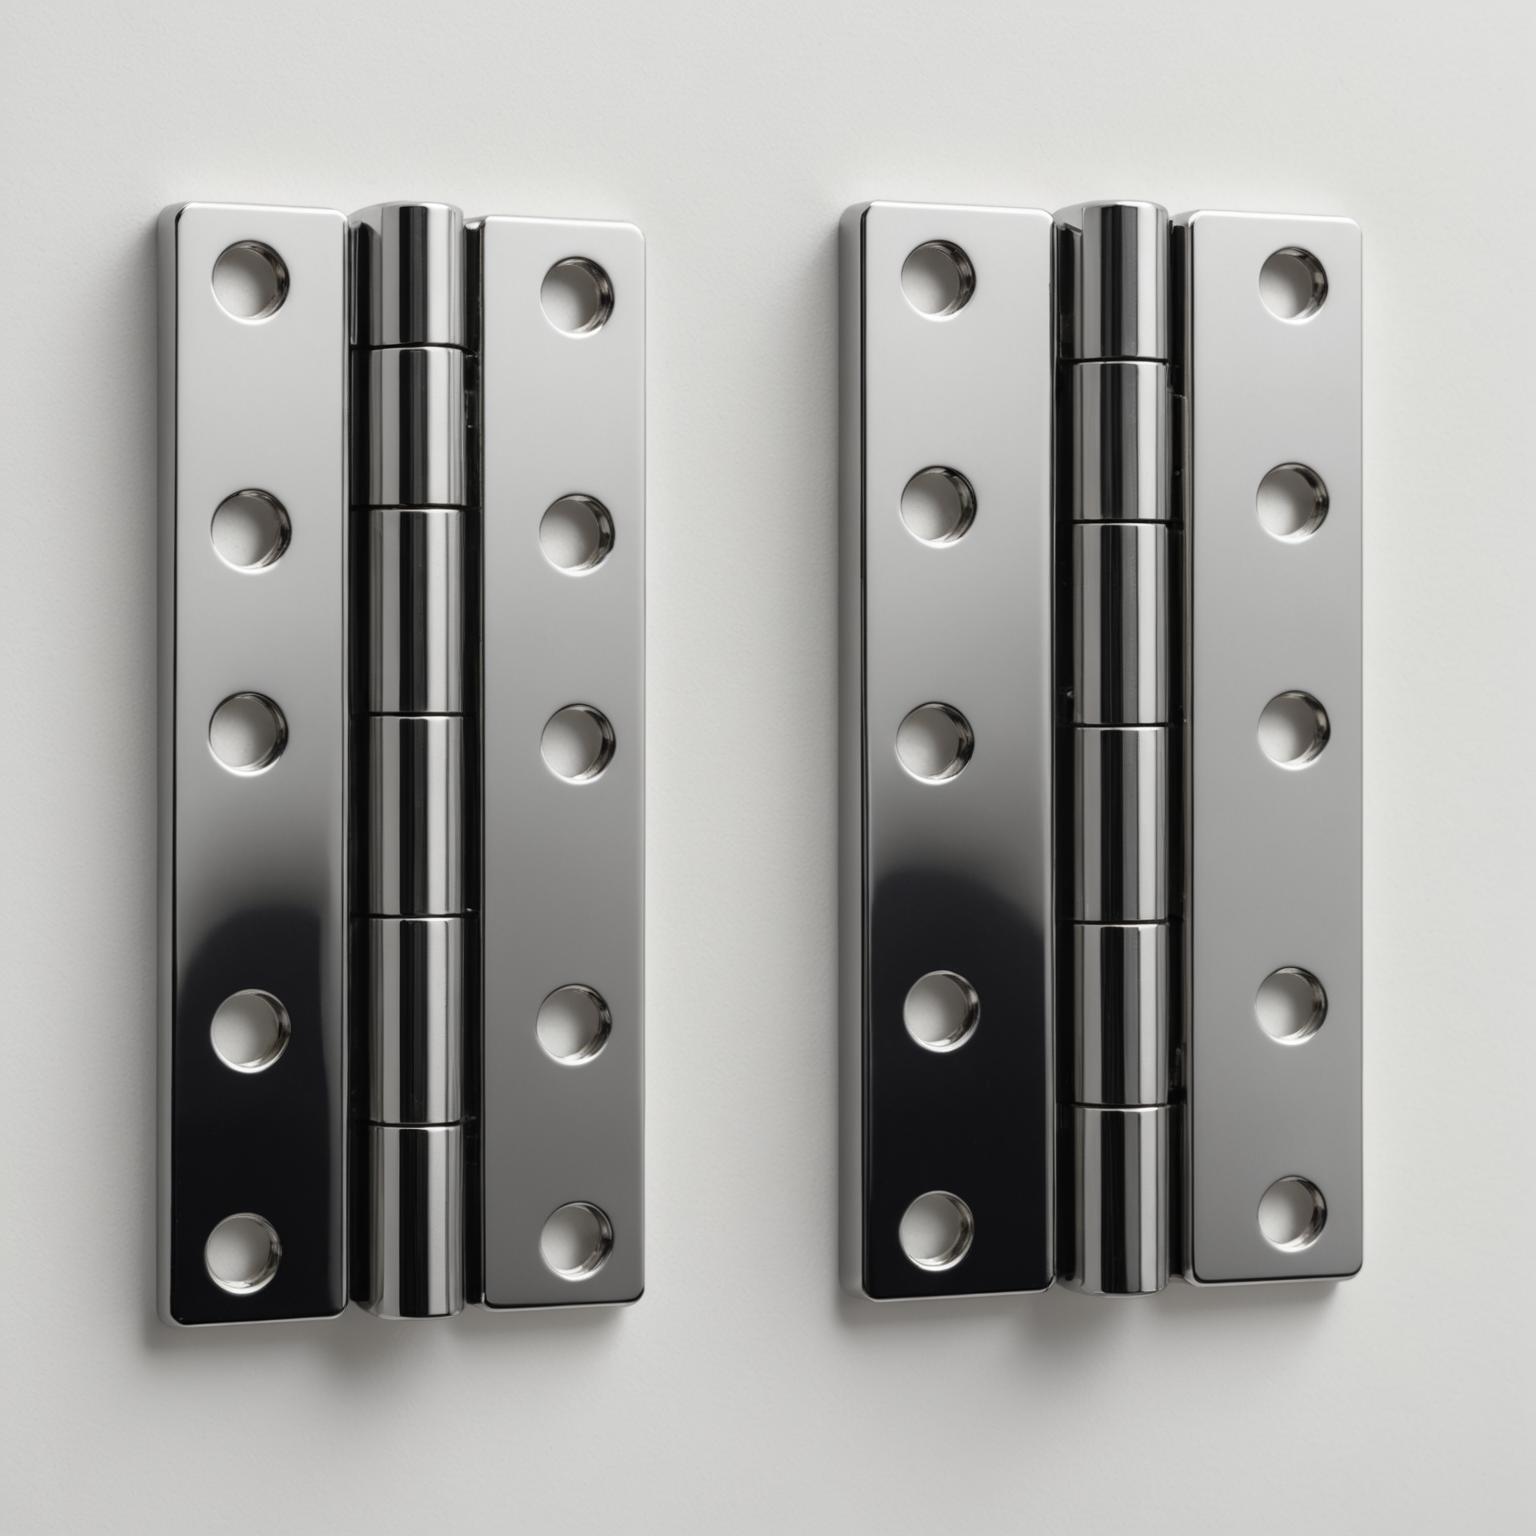
The Advantages of Choosing Stainless Steel Hinges
Before we dive into the installation process, it's important to understand why stainless steel is the superior choice for door hinges. The primary benefit is its exceptional durability and strength. Hinges crafted from premium-grade stainless steel are designed to support substantial weight loads, making them ideal for both heavy residential doors and demanding commercial applications. This inherent strength prevents the door from sagging or becoming misaligned over time, even with frequent use. Furthermore, stainless steel offers unparalleled resilience against corrosion and rust. This makes it a perfect material for doors in various environments, including humid areas like bathrooms or coastal regions, ensuring the hinge maintains its integrity and appearance without tarnishing.
Beyond its functional superiority, stainless steel brings a sleek, modern elegance to any space. Finishes like brushed or satin nickel complement a wide range of decor styles, from industrial to contemporary. High-quality hinges often incorporate advanced features for smoother operation. For instance, an integrated ball bearing design ensures a frictionless, whisper-quiet motion, eliminating annoying squeaks and reducing wear and tear. Similarly, details like a knurled barrel design also contribute to a silent, effortless swing. When you choose a well-engineered stainless steel hinge, you're not just getting a piece of hardware; you're investing in reliability, security, and sophisticated style.
Preparing for Installation: Tools and Materials
Proper preparation is the key to a smooth and successful installation. Before you begin, gather all the necessary tools and materials to have them within reach. This will prevent interruptions and help you work more efficiently. You will need your new stainless steel hinges and the screws that are typically included with them. For tools, have a power drill with a Phillips head bit or a manual screwdriver ready. A tape measure and a pencil are essential for accurate markings. If you need to create or adjust the recessed area for the hinge, you will require a sharp wood chisel and a hammer. To ensure the door is properly supported and positioned during the process, have some door wedges or shims on hand. Finally, a level will help you confirm that the door is hanging straight, and a pair of safety glasses is always recommended for eye protection.
Step-by-Step Guide to Installing Your Door Hinges
With your tools ready, you can begin the installation. First, if you are replacing old hinges, you must remove the old door. Use wedges to support the bottom of the door and keep it stable. Begin by unscrewing the hinges from the door frame, starting with the bottom hinge and working your way up. Once the frame side is detached, carefully unscrew the hinges from the door itself. Next, compare your new stainless steel hinge to the old one. If it's a perfect match, you can proceed. If the size or screw hole pattern is different, you will need to make adjustments. For misaligned screw holes, fill the old holes with wood filler or a small wood dowel, let it dry, and then sand it smooth. If the hinge plate is a different size, you may need to use your chisel to carefully expand the mortise (the recessed area) in both the door and the frame for a flush fit. When ready to install the new hardware, start by attaching the hinge leaves to the door. Place the hinge in its mortise, mark the screw holes with a pencil, and drill small pilot holes to prevent the wood from splitting. Then, securely fasten the hinge with the provided screws. Repeat this for all hinges on the door.
Final Adjustments for a Perfect Fit
After attaching the hinges to the door, it's time to hang it in the frame. Position the door back into the opening, using your wedges to elevate it to the correct height and ensure even spacing on all sides. Align the hinge leaves with the mortises on the door frame. To make this step easier, secure just one screw in the top hinge first. This will hold the door's weight while you align the other hinges. With the top hinge partially secured, check the door's alignment and give it a gentle swing to see how it moves. Once you are satisfied with its position, proceed to drill pilot holes and install the remaining screws in all the hinges on the frame. It's best to tighten them firmly but avoid over-tightening, which could strip the wood. A hinge with six strategically placed mounting holes will provide an exceptionally firm grip and prevent any future issues. After all screws are in place, open and close the door several times to test its operation. It should swing smoothly and quietly without any binding or rubbing against the frame. If you notice any issues, you can make minor adjustments by placing thin cardboard shims behind a hinge leaf to alter the door's position.
Enjoy Your Newly Upgraded Door
Congratulations, you have successfully completed your stainless steel hinge installation. By following this Stainless Steel Hinge Installation Tutorial, you have not only improved the functionality of your doorway but also added a touch of modern sophistication. The strength and corrosion resistance of your new hardware ensure that your door will operate flawlessly for years to come, free from sagging and squeaking. Taking the time to properly install high-quality components is an investment in your home’s durability and value. Now you can enjoy the peace of mind that comes with a secure, stable, and beautifully functioning door, a testament to quality craftsmanship and your own DIY skills.


